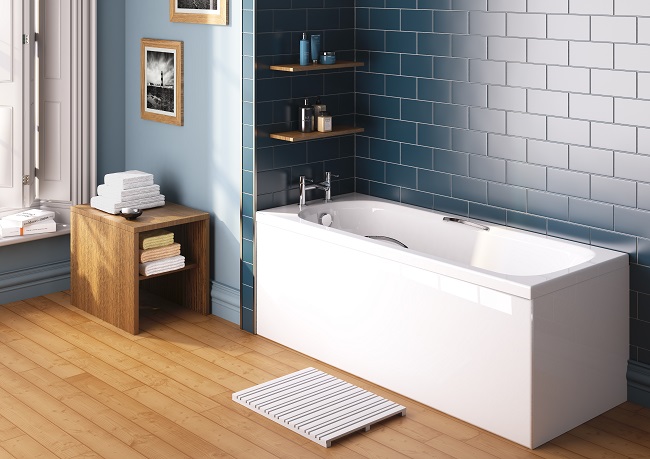
Is the sealant around your bathtub beginning to show signs of wear and tear?
If so, it could be time for a refresh, and the good news is that it’s a straightforward DIY task.
Not only will replacing the sealant around your bath rejuvenate your bathroom’s appearance without breaking the bank, but it will also ensure that any unsightly mould is banished for good.
You don’t have to splurge on a professional to get the job done; you can easily tackle this project yourself.
Let’s dive into this comprehensive guide on how to replace the sealant around your bath and give your bathroom a fresh, clean look.
Gathering Your Supplies
Before you get started, ensure you have the following supplies ready:
- Sealant
- Cartridge gun
- Sealant remover
Now that you’re equipped let’s begin.
Step 1: Removing the Old Sealant
The first and crucial step is to remove the old sealant effectively, because you obviously cannot put new sealant over the top of the old stuff!
Here’s how to do it:
- Begin by applying a sealant softener or remover to the old sealant. Let it sit for about 10-15 minutes to soften the sealant.
- Once you’ve left it for a while, take a plastic scraper and gently remove the old sealant from around the bath. Be cautious not to scratch or damage the bathtub‘s surface.
- After removing the old sealant, scrub the area with a bathroom cleaner or warm soapy water. Make sure to thoroughly clean the surface and then dry it off.
Step 2: Applying the New Sealant
Now that the old sealant is gone, it’s time to apply the new one.
Follow these steps to get the job done:
- Before applying the new sealant, fill your bathtub with water. This step helps prevent the new sealant from cracking when you use the bath.
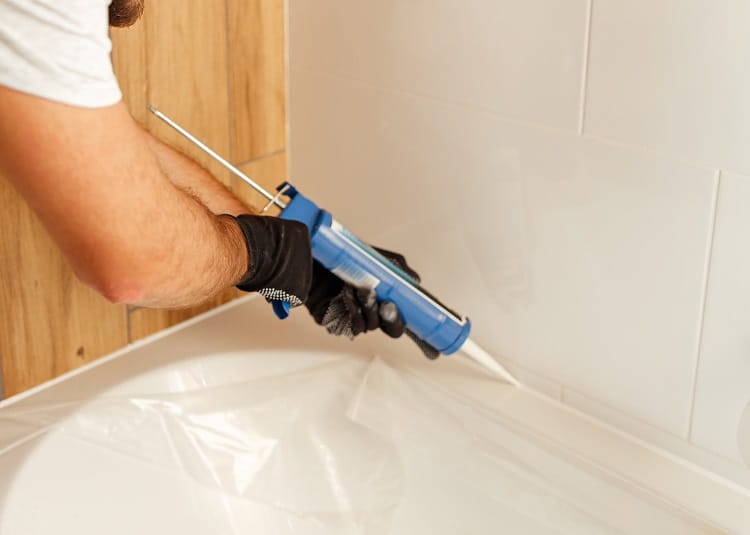
- Install the sealant cartridge into the gun and trim the nozzle’s end to match the gap you’ll be filling with the new sealant.
- Sit on the edge of your bath and gently press the trigger on the cartridge gun to fill the gap with the new sealant.
- After filling the gap, use a rounded edge tool to smooth the sealant. Ensure it’s at an angle, which will help water shed more effectively.
Step 3: Allow the Sealant to Dry
Before you can enjoy a relaxing soak in your bath, it’s essential to ensure that the new sealant has dried completely.
If there’s any excess sealant, you can easily remove it with white spirit.
By following these steps, you can easily refresh the look of your bathroom while preventing mold growth.
Replacing bath sealant is a cost-effective DIY project that can make a significant difference in the overall appearance of your bathroom.
So, roll up your sleeves and give your bathroom the makeover it deserves!
Step 4: Enjoy Your Refreshed Bathroom
Once the new sealant has dried completely, which usually takes a few hours to a day, depending on the product you’ve used, your bathroom is ready for use.
Now, you can enjoy a relaxing bath without worrying about water leaks or unsightly mould.
Maintenance Tips for Bathroom Sealant
To ensure the longevity of your newly applied sealant, here are some maintenance tips.
- Regularly inspect the sealant for any signs of wear or damage. If you notice cracks or gaps, it’s essential to address them promptly to prevent water damage.
- Clean the sealant regularly with a mild bathroom cleaner to keep it looking fresh and prevent the buildup of soap scum and grime.
- Avoid using abrasive scrubbers or harsh chemicals when cleaning the sealant, as these can damage it.
- If you ever need to replace the sealant again in the future, follow the same steps outlined in this guide.
By following these maintenance tips, you can ensure that your bathroom continues to look clean and well-maintained for years to come.
Get Replacing That Bathroom Sealant
Replacing the sealant around your bath is a simple yet effective way to freshen up your bathroom’s appearance and maintain its cleanliness.
With the right supplies and a little bit of effort, you can complete this DIY project in no time.
By removing the old sealant, applying the new sealant properly, and allowing it to dry, you’ll have a watertight seal that not only enhances the aesthetics of your bathroom but also ensures its functionality.
Plus, regular maintenance will keep it looking pristine.
So, why wait? Take the initiative to replace your bath sealant and enjoy a bathroom that looks and feels brand new.
Say goodbye to mould and water leaks, and hello to a revitalized bathing experience. Your bathroom deserves it!
John has a background in sports journalism, and lists content writing amongst his primary passions. He provides expert bathroom trends commentary and analysis, as well as offering meticulously researched answers to the most frequently asked bathroom posers.


